 Pin
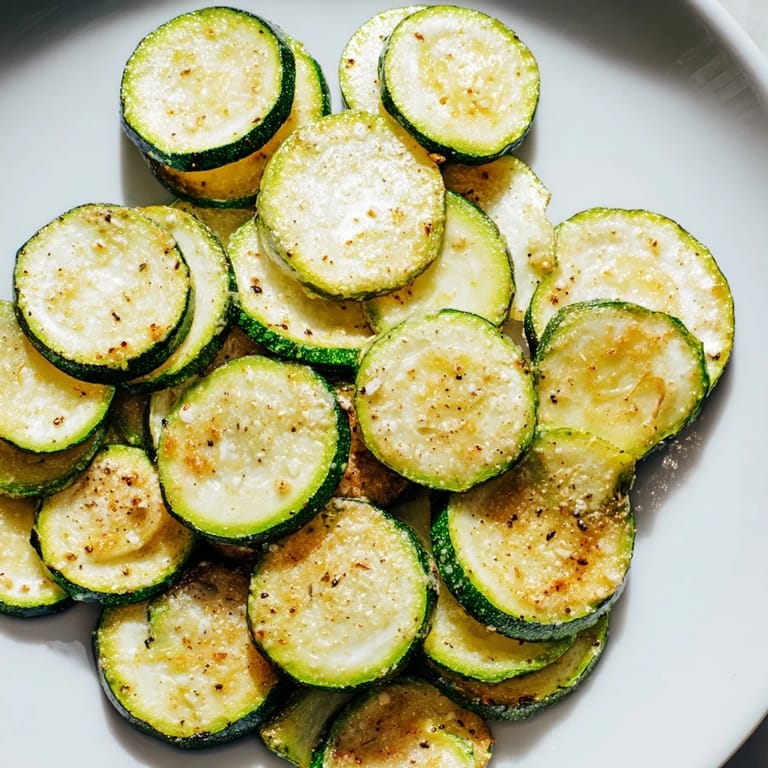
Pin I discovered zucchini chips by accident one summer afternoon when my garden exploded with overgrown zucchini and I couldn't bear to waste another one. Standing at the cutting board, I sliced them paper-thin on a whim, tossed them with oil and salt, and shoved them in a low oven while I got distracted with other things. When I checked on them an hour later, the smell hit me first—toasty and nutty, nothing like raw vegetables. What emerged were these golden, impossibly crispy rounds that tasted nothing like the mushy zucchini bread I'd made a hundred times before. My daughter ate half the batch before they even cooled completely.
A few years later, I made these for a potluck where everyone brought the same sad salads and casseroles. I brought a container of crispy zucchini chips seasoned with smoked paprika and garlic, partly joking that nobody would want them. They were gone within twenty minutes, and someone actually asked if I could make them again the next week. That's when I realized these weren't just a way to use up garden overflow—they were genuinely good.
Ingredients
- Zucchini: You'll want medium ones about the same width so they dry evenly; skip the massive ones hiding under leaves, they tend to be watery and never quite crisp up the same way.
- Olive oil: Just enough to coat every slice lightly—too much and they fry instead of bake and turn greasy.
- Sea salt and black pepper: The foundation that lets the zucchini taste like itself.
- Garlic powder and smoked paprika: Optional but they transform these from plain crunchy snack into something you'll actually crave.
Tired of Takeout? 🥡
Get 10 meals you can make faster than delivery arrives. Seriously.
One email. No spam. Unsubscribe anytime.
Instructions
- Set your oven low and line your sheets:
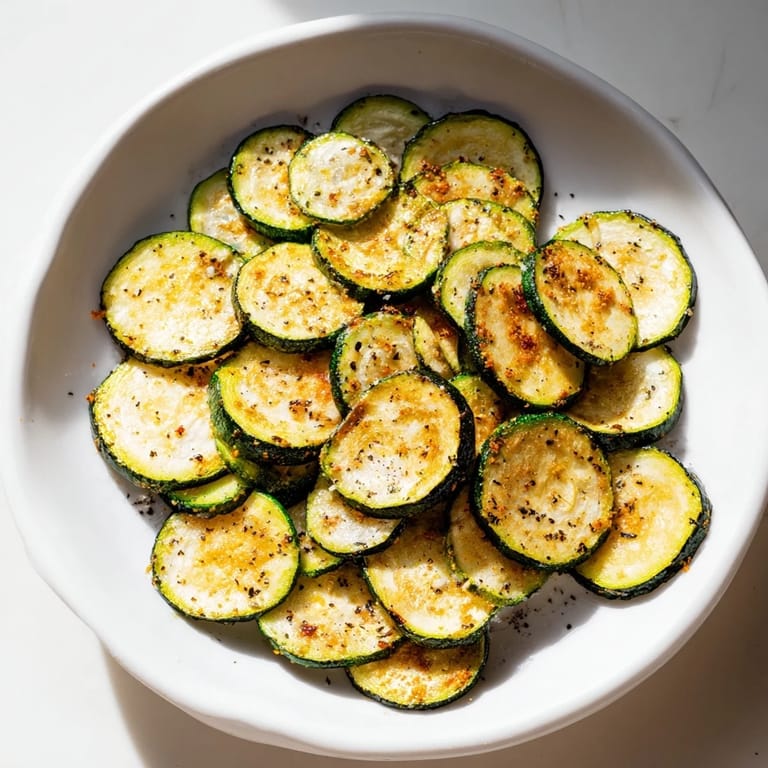
- Preheat to 225°F and line two baking sheets with parchment paper. This low temperature is the secret—it lets moisture escape slowly so you get crispy, not burnt.
- Prep the zucchini properly:
- Wash, dry completely, then slice into thin rounds about 1/8 inch thick using a mandoline if you have one. A sharp knife works too, but the mandoline gives you that consistent thickness that matters for even baking.
- Remove excess moisture:
- Pat every single slice dry with paper towels—this step sounds tedious but it's the difference between crispy and chewy.
- Coat and season:
- Toss the slices in a bowl with olive oil, salt, pepper, and whatever optional seasonings call to you. Make sure every piece gets touched by the oil and seasonings.
- Arrange in a single layer:
- Spread them on the prepared sheets so they don't touch or overlap—they need air flowing around them to crisp up properly.
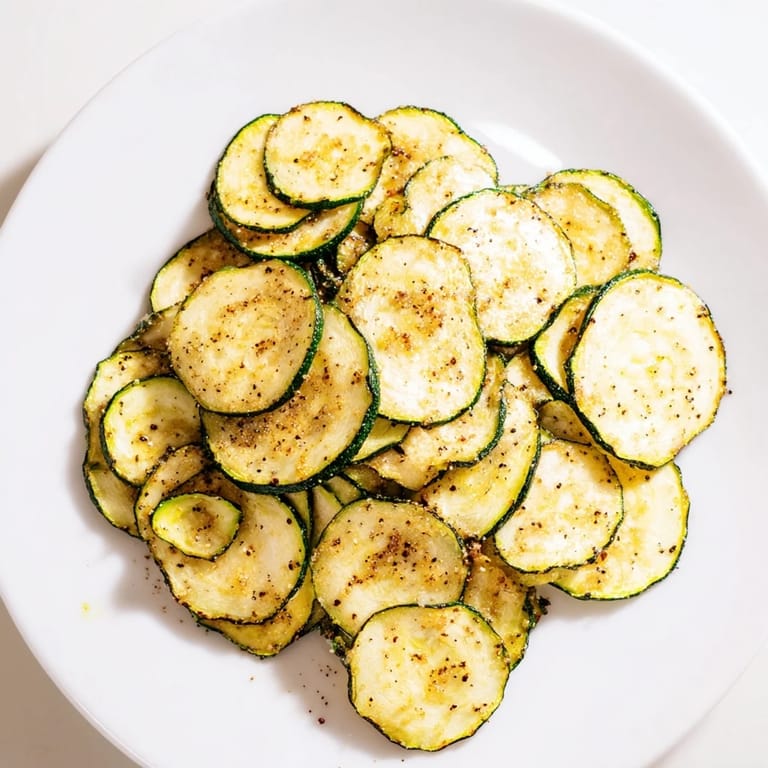
- Bake low and slow:
- Bake for about an hour, then flip the chips and rotate the sheets. Give them another 30 to 40 minutes until they're golden and have lost their bendiness.
- Cool completely:
- Leave them on the baking sheets as they cool—they'll crisp up even more. If you move them too soon, they can get soft again.
 Pin
Pin There's something almost magical about biting into something that tastes like pure vegetables but has the crispness and satisfaction of a snack you're not supposed to be eating. These chips bridged a gap in my kitchen I didn't know I had, becoming the thing people actually want to grab instead of reaching for the bag of store-bought chips.
Seasoning Variations That Actually Work
The beauty of these chips is that they're a blank canvas. I've made them with smoked paprika and garlic powder, which gives them a savory depth, and also with just salt and pepper when I wanted to taste the zucchini itself. Italian herbs feel natural here, and a whisper of chili powder adds just enough heat to be interesting. One evening I sprinkled them with nutritional yeast right before baking, and they took on an almost cheesy flavor without any dairy. Don't be afraid to experiment with what you have in your spice cabinet.
Timing and Temperature Matter More Than You'd Think
I used to crank my oven to 350°F thinking I could rush the process, but the chips came out crispy on the outside and weirdly rubbery inside. Dropping the temperature to 225°F felt counterintuitive until I realized the slow bake lets the moisture escape gradually instead of creating steam pockets inside. The flipping and rotating halfway through keeps things from browning too much on one side. This isn't a recipe where you can cut corners and get away with it, but the payoff is absolutely worth the time.
Storage and Day-Old Disappointment
These are best the day you make them, when the crunch is at its peak and you can still taste every bit of seasoning. If you must store them, use an airtight container and they'll hold for maybe a day before humidity wins and they get soft. I've tried restoking them in a warm oven, which brings back a little crispness but never quite the same magic as fresh. The lesson here is that sometimes the best food is meant to be made and eaten in the same moment, and that's actually kind of beautiful.
- Make these the afternoon you want to eat them for maximum satisfaction.
- If you do have leftovers, a few minutes in a warm oven can bring back some crunch.
- They make a great side to eggs at brunch if you wake up with leftovers you forgot about.
 Pin
Pin There's something deeply satisfying about turning something as ordinary as a zucchini into something that tastes indulgent and crispy. Once you make these, you'll find yourself watching for zucchini at the market instead of trying to avoid it.
Recipe FAQ
- → How thin should zucchini slices be?
Slices around 1/8 inch (3 mm) thick ensure even baking and optimal crispiness.
- → Can I use different seasonings?
Yes, try chili powder, Italian herbs, or nutritional yeast to customize the flavor.
- → What temperature is ideal for baking?
Low heat at 225°F (110°C) helps dry and crisp the slices evenly without burning.
- → How to store leftovers?
Keep cooled chips in an airtight container for up to 2 days to retain crunch.
- → Why pat zucchini dry before baking?
Removing excess moisture prevents sogginess and promotes crisp texture.