 Pin
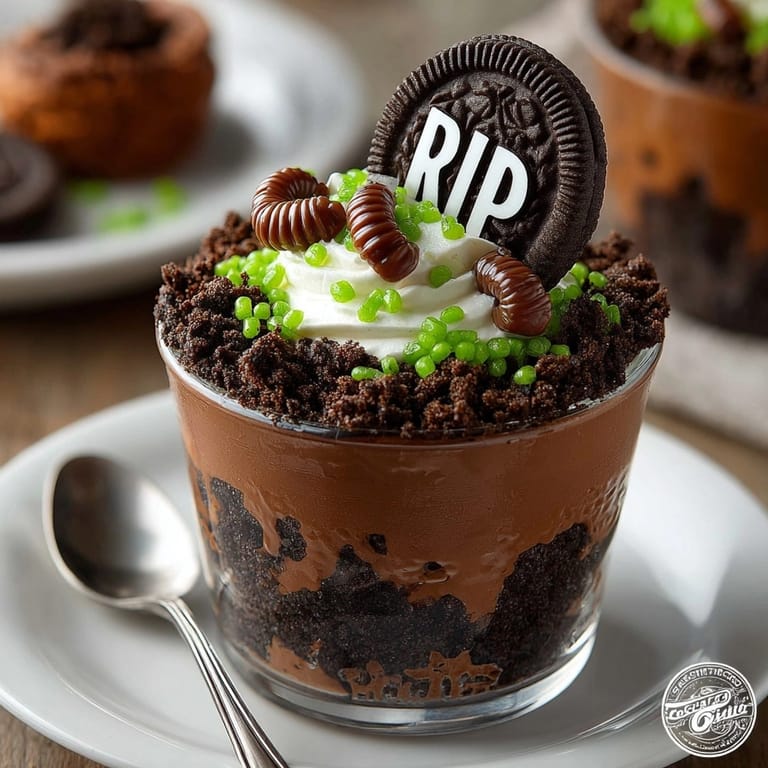
Pin Haunted Graveyard Pudding Cups instantly bring spooky fun to any Halloween table with creamy chocolate layers, crunchy cookie dirt, and playful edible decorations that make kids and adults grin alike. These no-bake treats are not only quick to whip up but also double as a creative activity for party guests. There is nothing better than seeing everyone personalize their own mini graveyards with gummy worms and goofy tombstones after dinner.
The first time I made these, my oldest insisted on making one for her teacher, and now it is a family tradition. It is amazing how much joy a simple pudding cup can bring when you make it just a little spooky.
Ingredients
- Cold whole milk: gives the pudding its ultracreamy texture and helps everything set up firm for easy serving. Look for fresh milk with a clean scent and a recent expiration date
- Instant chocolate pudding mix: creates rich chocolate flavor in minutes. I always opt for classic brands for consistency
- Chocolate sandwich cookies: provide that perfect “dirt” crunch. Generic brands work, but I find name brands hold their crumb best
- Ovalshaped chocolate cookies or biscuits: mimic classic tombstones. Choose ones with a firm texture to stand upright
- Whipped cream or whipped topping: adds whimsical fluff. Go for stable whipped topping if you need it to hold up longer
- Assorted gummy worms: add playful color and a fun chewy contrast
- Black decorating gel or edible marker: makes writing spooky phrases quick and easy
- Green sprinkles or coconut dyed green: creates a grassy graveyard look. Fine shredded coconut dyes especially well
- Choose your favorite brands and check ingredient lists for dietary needs when shopping. I always pick cookies with a deep chocolate aroma and pudding mixes with clear, simple ingredients
Tired of Takeout? 🥡
Get 10 meals you can make faster than delivery arrives. Seriously.
One email. No spam. Unsubscribe anytime.
Instructions
- Mix the Pudding:
- Whisk cold whole milk and instant chocolate pudding mix in a large bowl for two full minutes until thick and smooth. Let it sit five minutes or until set and glossy. A thorough whisk ensures the pudding thickens evenly
- Assemble the Pudding Cups:
- Spoon pudding evenly into eight small clear cups or jars. Filling each cup with a similar amount creates that “layered mud” look
- Add the Cookie Dirt:
- Crush chocolate sandwich cookies with a rolling pin or food processor. Sprinkle a thick, even coating over each pudding cup, pressing down lightly for full dirt coverage
- Decorate the Tombstones:
- Use black decorating gel or an edible marker to write spooky messages on oval cookies. Gently press one cookie into the back of each cup so it stands upright like a tombstone
- Add Edible Decorations:
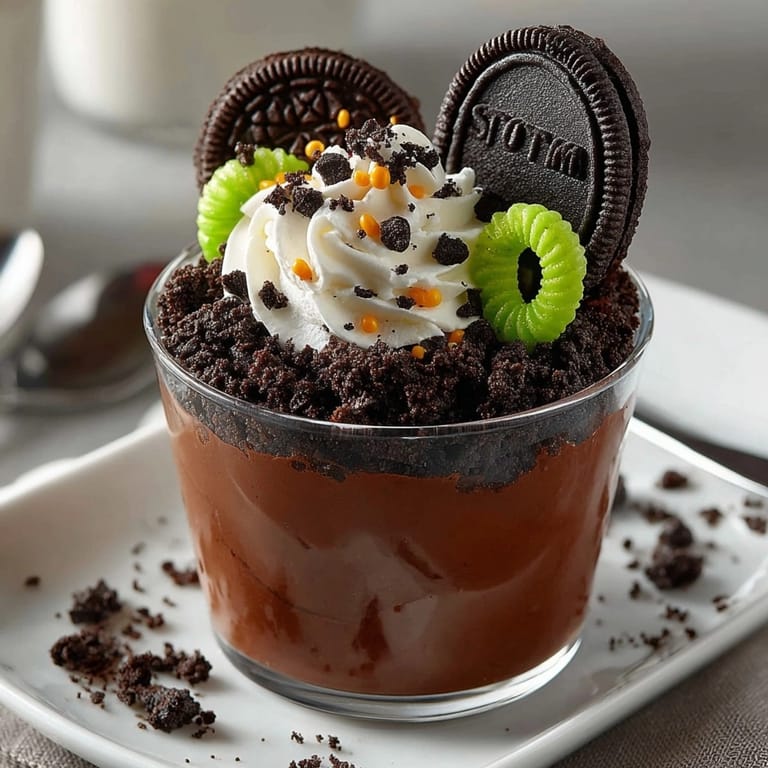
- Decorate each cup with gummy worms, dollops of whipped cream, and sprinkles or green coconut for grass. Let your imagination run wild with the tiny details
- Chill and Serve:
- Place decorated cups in the refrigerator until cold and ready to serve. Chilling helps the layers meld and holds the decorations in place
 Pin
Pin Chocolate sandwich cookies are my favorite part because they taste fantastic and really sell that “freshly dug dirt” look. Once, my youngest decorated every tombstone with a smiley face and it became the highlight of our Halloween spread.
Storage Tips
Keep the assembled pudding cups covered in the refrigerator where they stay fresh for up to two days. For best texture, add the gummy worms and whipped topping just before serving to prevent sogginess. If party prepping, you can make the pudding and crush the cookies a day in advance and decorate just before guests arrive.
Ingredient Substitutions
For a glutenfree version choose glutenfree sandwich cookies and instant pudding labeled gluten free. Dairyfree milk and nondairy toppers also work though the pudding may set slightly softer. Candy bones or pumpkinshaped candies are fun swaps if gummy worms are not available in your area.
Serving Suggestions
Serve these in clear disposable cups for easy transport and cleanup at parties. For a special touch add small plastic shovels as spoons or use themed Halloween picks as toppers. Set up a topping bar and let everyone create their own spooktacular masterpiece.
Cultural and Historical Context
Pudding cups are a beloved American treat that became popular in lunchboxes in the late twentieth century and got a Halloween twist as “dirt cups” when moms started using crushed cookies as “dirt.” Halloween itself is rich with traditions of playful spooky foods and this simple dessert captures that spirit perfectly with just a bit of whimsy and nostalgia.
Seasonal Adaptations
Use orange and black sprinkles for classic Halloween flair Try pumpkin or caramel pudding for a tasty fall variation Add crumbled spice cookies for extra warming flavor notes
Success Stories
This recipe never fails to bring people together. I have handed out pudding cups at neighborhood block parties and watched shy kids light up as they create their own edible graveyard. A friend once said even her puddingaverse child was won over by the cookie “dirt.”
Freezer Meal Conversion
This dessert does not freeze well after assembly because the cookies soften and the pudding can separate. For longer storage make the pudding component and keep it in an airtight container in the freezer. Thaw in the fridge overnight and assemble just before serving for best results.
 Pin
Pin I learned that the clearer the cup the more striking and spooky the layers look so I stock up on clear plastic cups each year just for these. Do not be afraid to get creative with toppings the wilder and spookier the better.
Recipe FAQ
- → Can I use homemade pudding instead of instant mix?
Yes, homemade chocolate pudding works as long as it’s thick enough to hold up the toppings.
- → How far in advance can I make these cups?
They can be assembled up to one day ahead. Store in the refrigerator until ready to serve.
- → What alternatives are there for cookie dirt?
You can use gluten-free sandwich cookies, chocolate wafer cookies, or even brownies crumbled finely.
- → Are the decorations safe for kids with allergies?
Always check labels on cookies and candies for allergens like nuts, wheat, and soy before using them.
- → Can I add other candy decorations?
Candy bones, gummy pumpkins, or fun shaped sprinkles all add festive touches to your spooky dessert.