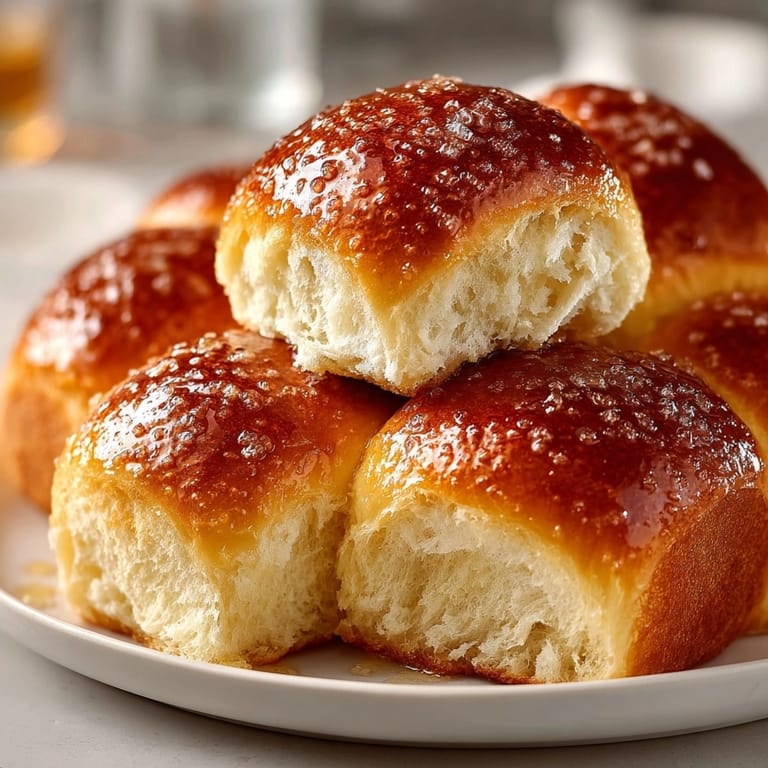
 Pin
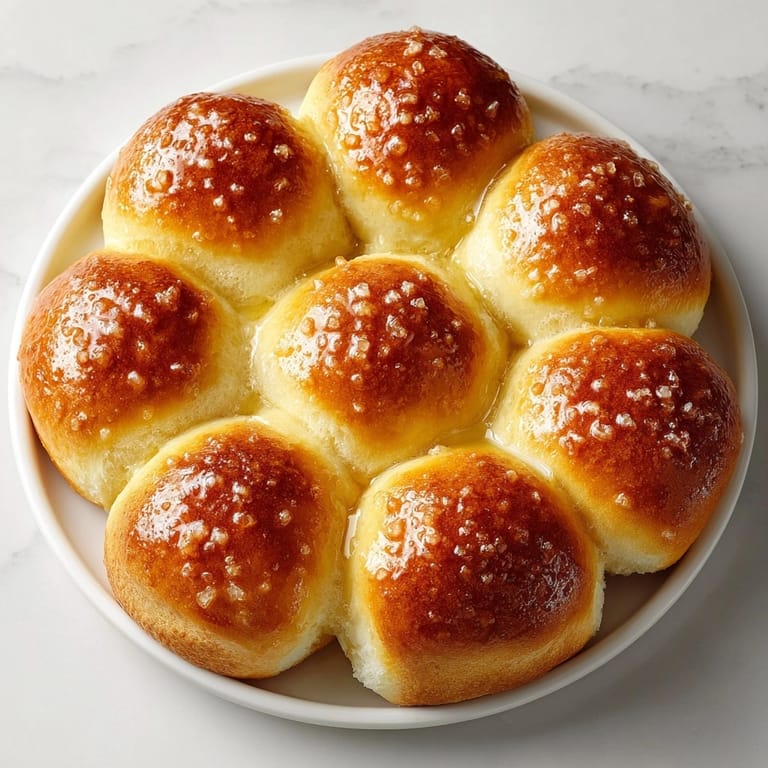
Pin This honey butter dinner roll recipe transforms any ordinary meal into something special with its pillowy soft texture and sweet buttery glaze. The combination of honey and butter creates an irresistible aroma that will have everyone gathering around your table before dinner is even served.
I first made these rolls for Thanksgiving dinner three years ago, and they've become mandatory at every family gathering since. My mother in law actually requested the recipe after claiming they were better than the ones she'd been making for 30 years!
Ingredients
- All purpose flour: provides the perfect structure while keeping the crumb tender
- Active dry yeast: ensures proper rising and that heavenly yeasty aroma
- Whole milk: adds richness that water simply cannot provide
- Honey: sweetens the dough naturally while helping create that golden brown crust
- Unsalted butter: enriches the dough for that melt in your mouth quality
- Salt: enhances all flavors and controls yeast activity for proper rising
- Egg: contributes to structure while adding richness to the final texture
Tired of Takeout? 🥡
Get 10 meals you can make faster than delivery arrives. Seriously.
One email. No spam. Unsubscribe anytime.
Instructions
- Activate The Yeast:
- Combine your warm milk and honey in a large bowl, aiming for milk that feels like bath water around 110°F. Sprinkle yeast over this sweet mixture and allow it to rest for a full 5 minutes until foamy and fragrant. This step confirms your yeast is alive and ready to work its magic in your dough.
- Build The Base:
- Add your melted butter, room temperature egg, and salt to the foamy yeast mixture. Mix thoroughly until completely combined. The room temperature egg is crucial here as a cold egg could shock your yeast and slow fermentation.
- Form The Dough:
- Gradually add flour, about one cup at a time, mixing between additions. This prevents flour clouds and ensures even hydration. Continue until a soft, slightly tacky dough forms that pulls away from the sides of the bowl but still feels slightly sticky to the touch.
- Develop The Gluten:
- Knead the dough for a full 8 to 10 minutes either by hand on a lightly floured surface or with your mixer's dough hook. The dough transforms during this process from shaggy and rough to smooth and elastic. When properly kneaded, it should pass the windowpane test where a small piece can stretch thin enough to see light through without tearing.
- First Rise:
- Place your kneaded dough in a greased bowl, turning once to coat all surfaces with oil. Cover with a clean kitchen towel or plastic wrap and let rise in the warmest spot in your kitchen for 60 to 75 minutes. Patience is key here as the dough needs to fully double in size, creating that light, airy texture we're after.
- Shape The Rolls:
- Once doubled, gently punch down the dough to release excess air bubbles. Divide into 12 equal portions using a kitchen scale for perfect uniformity or eyeball it if you're feeling confident. Shape each piece by pulling the edges toward the center and rolling between your palms to create a smooth surface tension. Arrange in your greased baking dish with sides just barely touching.
- Second Rise:
- Cover your shaped rolls and allow them to rise again for 30 to 40 minutes until noticeably puffy. During this time, preheat your oven to 350°F so it's perfectly hot when your rolls are ready to bake. The rolls won't quite double in size during this second rise, but they should look plump and fill more of the pan.
- Bake To Golden Perfection:
- Bake in your preheated oven for 18 to 22 minutes, rotating the pan halfway through for even browning. Look for a rich golden color on top and an internal temperature of about 190°F if you have a thermometer. The rolls should sound hollow when tapped on the bottom.
- Apply The Honey Butter Finish:
- While your rolls are still hot from the oven, whisk together melted butter and honey until completely combined. Use a pastry brush to generously coat the top of each roll, allowing the warm honey butter to seep into all the nooks and crannies. This creates that signature glossy finish and adds incredible flavor.
 Pin
Pin My favorite thing about these rolls is how the honey butter creates this subtle sweetness that complements absolutely everything from holiday ham to weeknight spaghetti. My daughter has started calling them cloud rolls because they're so incredibly light and fluffy compared to store bought varieties.
Storage Tips
These honey butter rolls maintain their freshness remarkably well when stored properly. Keep them in an airtight container at room temperature for up to 3 days. The honey in both the dough and topping acts as a natural preservative, helping them stay softer longer than typical dinner rolls. For longer storage, freeze completely cooled rolls in a zip top bag with as much air removed as possible for up to 3 months. Thaw at room temperature and warm in a 300°F oven for 5 minutes before serving to restore that fresh baked quality.
Make Ahead Options
The beauty of this recipe lies in its flexibility for busy schedules. You can prepare the dough through the first rise, then refrigerate overnight. The cold temperature slows yeast activity without stopping it completely, allowing for flavor development similar to sourdough. The next day, remove the dough from the refrigerator, let it sit at room temperature for 30 minutes, then proceed with shaping, second rise, and baking. Alternatively, you can fully bake the rolls, allow them to cool completely, then freeze for up to 3 months in an airtight container. Refresh frozen rolls in a 300°F oven for 10 minutes before serving.
Flavor Variations
While the classic honey butter version is perfection, this versatile dough welcomes creative additions. For herb rolls, add 2 tablespoons of chopped fresh herbs like rosemary, thyme, or chives to the dough during mixing. For cheesy rolls, fold in 3/4 cup of shredded cheddar or parmesan before the first rise. Create cinnamon rolls by spreading the flattened dough with a mixture of brown sugar, cinnamon, and butter before rolling and cutting into spirals. For a festive touch during holidays, add orange zest to the dough and replace some honey with orange juice in the glaze.
Troubleshooting Tips
Dough not rising properly Ensure your milk temperature is correct around 110°F as too hot will kill yeast and too cold won't activate it Rolls turning out dense Check your flour measurement technique using the spoon and level method rather than scooping Uneven browning Rotate your pan halfway through baking and consider using an oven thermometer to verify temperature accuracy
Serving Suggestions
These versatile rolls complement nearly any meal but truly shine alongside holiday favorites like roasted turkey, glazed ham, or beef tenderloin. For everyday meals, serve them with soups and stews where they excel at soaking up flavorful broths. Create memorable sliders with leftover rolls by slicing horizontally and filling with pulled pork, chicken salad, or roast beef. For breakfast, warm slightly and spread with additional honey butter or jam. The subtle sweetness also pairs wonderfully with spicy dishes, providing pleasant contrast to chili or curry.
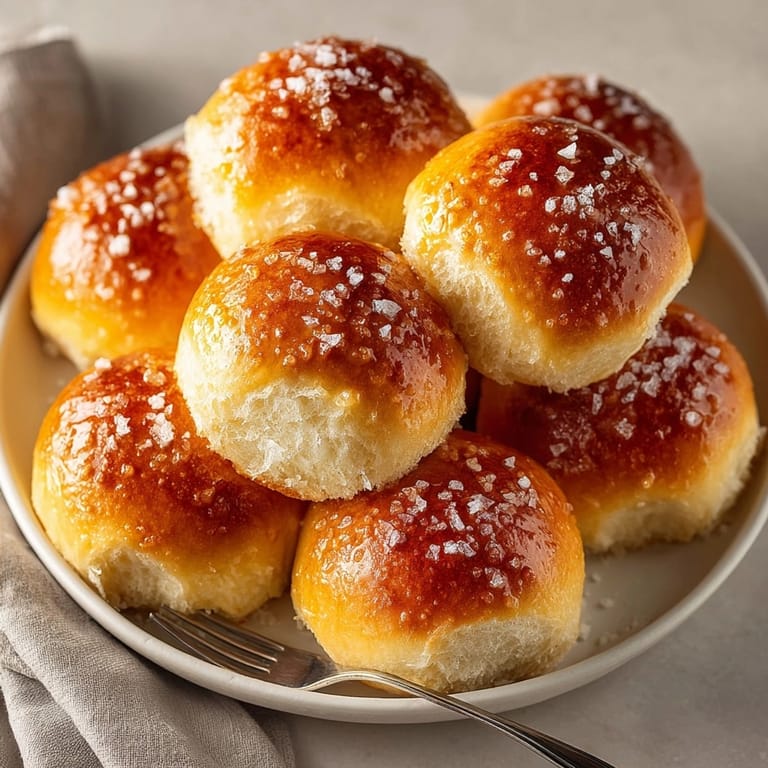
 Pin
Pin These rolls' tender crumb and delightful honey butter glaze make them the perfect companion to any meal. Enjoy them warm for the ultimate comforting experience.
Recipe FAQ
- → How do I make rolls extra soft and fluffy?
Use warm milk and be sure to knead the dough until smooth and elastic. Allowing the dough to rise fully gives your rolls a lighter texture.
- → What can I use instead of all-purpose flour?
You can substitute half or all of the all-purpose flour with bread flour for a softer, chewier result.
- → Can I prepare the dough ahead of time?
Yes, shape the rolls and refrigerate overnight after the first rise. Let them come to room temperature and complete the second rise before baking.
- → Is it possible to freeze these rolls?
Absolutely. Freeze baked and cooled rolls. Reheat in the oven before serving for best results.
- → Are these suitable for a vegetarian diet?
Yes, these rolls use only milk, eggs, and honey, making them suitable for vegetarian diets.
- → How do I achieve a shiny, golden crust?
Brush the tops with honey butter immediately after baking. This adds shine and extra flavor.