 Pin
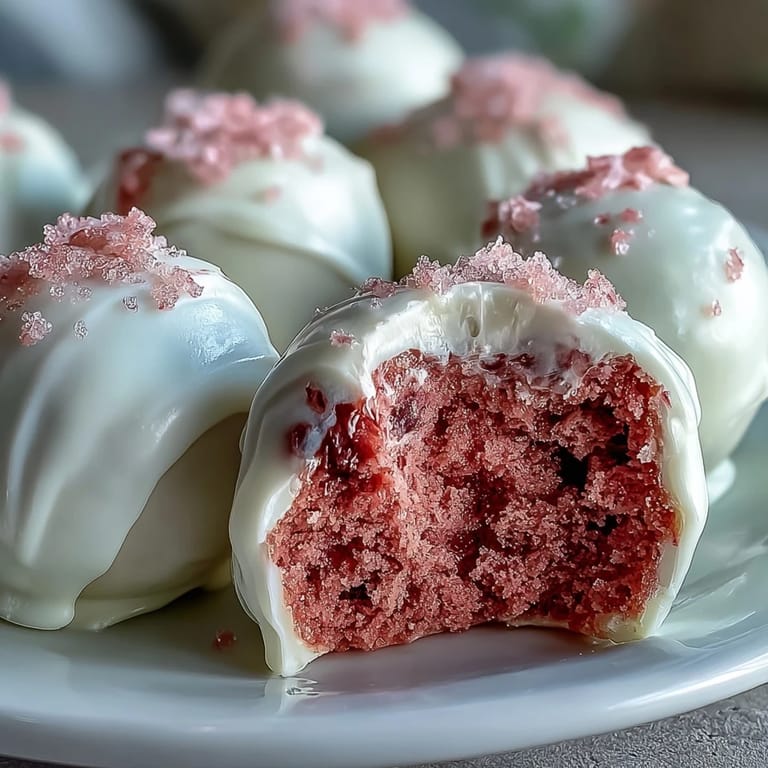
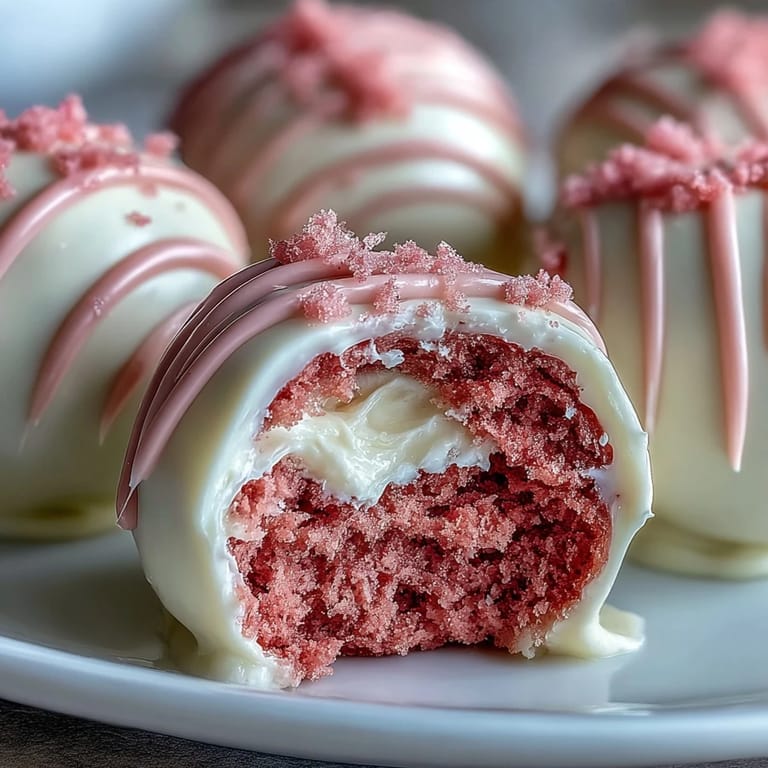
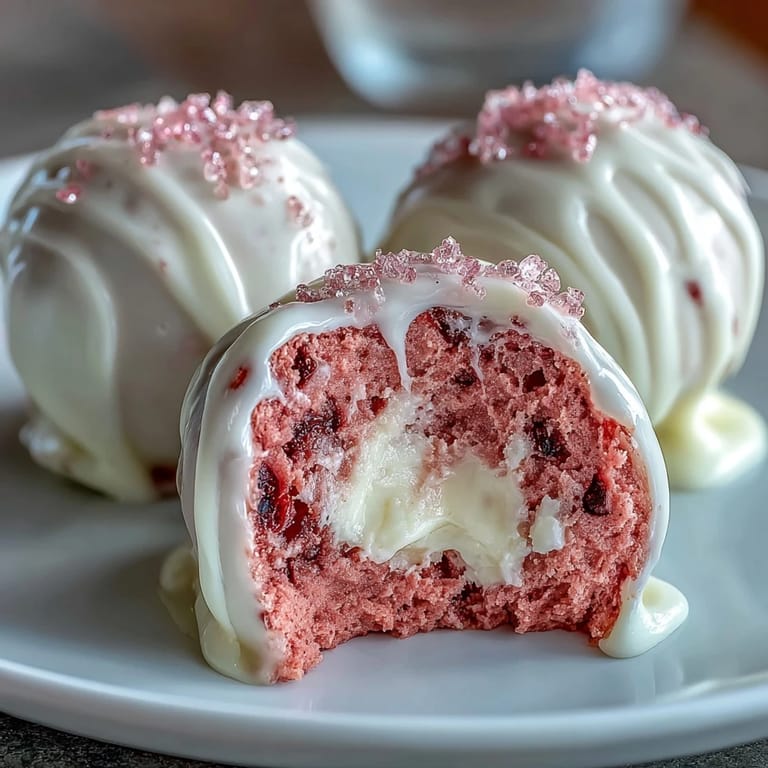
Pin My friend texted me at midnight asking if I could make something pink and special for her Galentines party, and somehow cake pops felt like the perfect answer. There's something about biting into a delicate sphere of velvet cake and discovering that tangy cream cheese surprise inside that feels genuinely thoughtful, not just sugary. I spent that evening in my kitchen mixing cocoa and buttermilk, watching the batter transform from burgundy to this gorgeous dusty pink that made me smile. These cake pops have become my go-to gift because they're small enough to share but fancy enough that people genuinely feel celebrated receiving them.
I made these for a small office gathering once, and watching people's faces light up when they bit into that creamy center was worth every minute of the prep work. Someone actually asked if I'd bought them from a bakery, which felt like the highest compliment my kitchen could receive that week.
Ingredients
- All-purpose flour (1 1/4 cups): This gives your cake structure without making it dense; sift it if you have time, but honestly, whisking it thoroughly does the job.
- Granulated sugar (1 cup): Too little and the cake tastes flat, too much and the frosting becomes cloyingly sweet once you mix them together.
- Unsweetened cocoa powder (1/4 cup): The secret ingredient that gives velvet cake its subtle depth; don't skip this or your cake will just taste like pink vanilla.
- Buttermilk (1/2 cup): The acidity here reacts with the baking soda and cocoa to create that signature tender crumb you're after.
- Unsalted butter (1/2 cup): Room temperature is non-negotiable because cold butter will create lumps that won't fully incorporate into your batter.
- Eggs (2 large): Also bring them to room temperature so they emulsify properly and give you a fluffy cake, not a dense one.
- White vinegar (1 tsp): This works with the baking soda to create tiny air pockets, making your cake pops light and tender rather than gummy.
- Pink gel food coloring (1-2 tsp): Gel coloring gives you true pink without adding extra liquid like liquid food coloring would, which could mess up your batter consistency.
- Cream cheese frosting (4 oz cream cheese plus 2 tbsp butter): Let both soften completely at room temperature, and sift your powdered sugar or you'll have grainy frosting that won't mix smoothly with the cake crumbs.
- White chocolate or candy melts (12 oz): Candy melts are honestly easier for dipping because they have a lower melting point and won't seize up the way real chocolate can.
Tired of Takeout? 🥡
Get 10 meals you can make faster than delivery arrives. Seriously.
One email. No spam. Unsubscribe anytime.
Instructions
- Set Up Your Stage:
- Preheat to 350°F and get your 8-inch square pan prepped with butter and parchment, because once that batter is mixed, you want to get it into the oven within a couple minutes. This is the moment where organization actually matters.
- Build Your Dry Mixture:
- Whisk flour, sugar, cocoa powder, baking soda, and salt together in a medium bowl, making sure there are no cocoa lumps hiding at the bottom. This takes maybe two minutes but prevents bitter spots in your finished cake.
- Create the Wet Base:
- Beat softened butter until it's pale and creamy, then add eggs one at a time while beating, because this creates tiny air pockets that make your cake tender. Stir in vanilla and vinegar, and listen for that little fizz as the vinegar reacts with the butter.
- Combine Without Overmixing:
- Alternate adding dry ingredients and buttermilk in three batches, starting and ending with dry ingredients; stop as soon as you don't see any flour streaks, because overmixing develops gluten and makes your cake tough. This is where patience actually changes the outcome.
- Paint It Pink:
- Add your pink gel coloring and mix just until the color is even and vibrant throughout. Start with 1 teaspoon and add more if you want a deeper shade, because it's easier to add than to take away.
- Bake and Cool Completely:
- Pour into your prepared pan and bake for 22-25 minutes until a toothpick comes out clean with maybe a few moist crumbs. Let it cool all the way down to room temperature on a wire rack, or your frosting will melt when you mix it together.
- Make Your Frosting Silky:
- Beat softened cream cheese and butter together until completely smooth, then gradually add your sifted powdered sugar so you don't create a cloud of powdered sugar everywhere. Beat until fluffy, which takes about two minutes longer than you think it should.
- Transform Cake into Pop Mixture:
- Crumble your completely cooled cake into a large bowl with your hands, breaking it into small pieces so it mixes evenly with the frosting. Add frosting gradually and mix with your hands until the mixture holds together when you squeeze it, like a very dense cookie dough.
- Roll and Chill Your Balls:
- Roll mixture into 1-inch balls and place them on a parchment-lined baking sheet, then refrigerate for at least 30 minutes so they're firm enough to dip without falling apart. I usually do this step while watching something on my phone because rolling 24 balls by hand is meditative but takes time.
- Melt Your Chocolate Gently:
- Melt white chocolate in a microwave-safe bowl in 20-second bursts, stirring between each one to avoid overheating and breaking the emulsion. Once smooth, let it cool for a minute so it's not so hot that it makes your cake pop mixture slide right off the stick.
- Secure Your Sticks:
- Dip just the tip of each cake pop stick into melted chocolate and insert it halfway into a chilled cake pop ball, then return the whole baking sheet to the refrigerator for 10 minutes. This chocolate acts like edible glue and prevents your cake pops from spinning off the stick during the final dip.
- The Main Event Dip:
- Hold your cake pop by the stick and dip it completely into the melted white chocolate with a gentle twisting motion, then slowly pull it out and tap the stick gently against the rim of the bowl to remove excess coating. This tapping motion is key because drips are charming, but blobs of chocolate are just sad.
- Decorate While Wet:
- Immediately after dipping, sprinkle on your decorations like edible glitter, nonpareils, or tiny heart candies while the chocolate is still tacky enough to hold them. Once the chocolate sets, decorations won't stick, so work quickly but not frantically.
- Set and Display:
- Place each finished cake pop upright in a styrofoam block or cake pop stand so the chocolate sets evenly and smoothly. They'll set at room temperature in about 20 minutes, faster if you slide them into the refrigerator.
 Pin
Pin There's a moment right before the chocolate coating sets when your cake pops look like tiny edible jewels, and that's when you realize why people actually bother making these instead of just eating regular cake. I made a batch for my mom's birthday and she kept them on the counter for three days because she didn't want to eat them, which seems like the ultimate compliment.
The Pink Velvet Story
Red velvet cake has that whole history and drama around it, but pink velvet feels fresher somehow, less about tradition and more about just celebrating the moment. The cocoa powder gives it this subtle earthiness that prevents it from tasting like you're eating a pink vanilla candle, and that's honestly the magic that makes these cake pops special instead of just cute. I discovered this ratio after making red velvet cake pops that tasted weirdly one-dimensional, and switching to less food coloring and keeping the cocoa changed everything.
Why This Frosting Matters
Store-bought frosting would definitely be easier, but cream cheese frosting cuts through the sweetness in a way that makes each bite feel intentional rather than just sugary. The butter keeps it creamy enough to mix with cake crumbs without becoming gritty, and the tanginess is exactly what your palate needs after eating white chocolate coating. I learned this the hard way when I tried using just cream cheese once and the frosting was so thick it wouldn't incorporate smoothly.
Storage and Shelf Life
These keep beautifully in an airtight container in the refrigerator for up to five days, though they honestly taste best within the first three days when the chocolate coating is still glossy and snappy. You can make them two days ahead of a party, which means you're not stressed the morning of, just positioning them on a platter and accepting compliments. If you somehow have leftovers, you can eat them straight from the fridge or let them come to room temperature for a slightly softer texture.
- If you're shipping these as gifts, wrap each one in tissue paper and nestle them in a sturdy box with packing material.
- Never leave them at room temperature for more than an hour because the white chocolate coating will soften and look sad.
- You can freeze them for up to two weeks in an airtight container, then thaw in the refrigerator before serving.
 Pin
Pin These cake pops feel special because they're small enough to give away but impressive enough that people actually feel celebrated receiving them. Make them for someone you love, or make them just because your kitchen deserves a moment of pink, chocolatey, friendship-celebrating joy.
Recipe FAQ
- → How do I achieve the vibrant pink color?
Use 1–2 teaspoons of pink gel food coloring added to the batter for a rich and even pink hue.
- → Can I substitute the white chocolate coating?
Yes, dark chocolate or flavored candy melts like strawberry work well for different tastes and colors.
- → What’s the best way to ensure cake pops hold together?
Mix crumbled cake with cream cheese frosting thoroughly and chill the formed balls before dipping to maintain shape.
- → How long do these cake pops stay fresh?
Stored in an airtight container in the refrigerator, they stay fresh for up to five days.
- → Are these suitable for vegetarians?
Yes, the ingredients used do not include meat or gelatin, making them vegetarian-friendly.