 Pin
Pin Last summer, my niece came over with her friends after swim practice, dripping wet and starving. I had overripe bananas on the counter and a jar of peanut butter in the pantry. Within twenty minutes, we had a tray of chocolate-dipped banana pops in the freezer, and those kids checked on them every ten minutes like they were waiting for magic to happen. When we finally pulled them out, frozen and glossy, they disappeared faster than I could say dessert.
I started making these when my son refused to eat plain bananas but would devour anything on a stick. One Saturday, I let him help coat them, and he took the job so seriously, tongue out in concentration, carefully rolling each one in sprinkles. Now every time he sees bananas getting speckled, he asks if its pop day. Its become our little ritual, and I love that hes proud of something he can actually make himself.
Ingredients
- Ripe bananas: The natural sweetness comes from here, so use bananas with a few brown spots for the best flavor and creaminess once frozen.
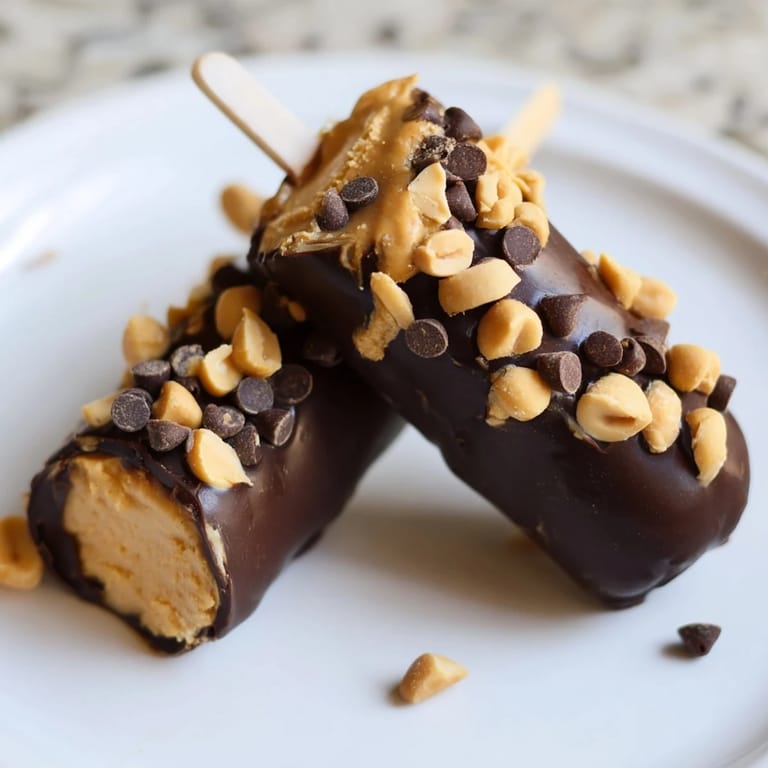
- Creamy peanut butter: This is the secret layer that keeps the chocolate from sliding off and adds richness without being too heavy.
- Dark or milk chocolate: I prefer dark for a less sweet finish, but milk chocolate makes kids happier, so I usually melt both and let everyone choose.
- Toppings: Crushed peanuts add crunch, coconut brings tropical vibes, and sprinkles make everything feel like a party.
Tired of Takeout? 🥡
Get 10 meals you can make faster than delivery arrives. Seriously.
One email. No spam. Unsubscribe anytime.
Instructions
- Prep the bananas:
- Peel and halve them crosswise, then push a popsicle stick into the cut end of each piece. They should feel sturdy enough to hold without wobbling.
- First freeze:
- Lay them flat on a parchment-lined tray and freeze for an hour. This firms them up so the peanut butter doesnt slide off when you spread it.
- Spread the peanut butter:
- Use a small spatula or the back of a spoon to smooth about a tablespoon over each frozen banana. Work quickly so your hands dont warm them up too much.
- Second freeze:
- Pop them back in the freezer for 15 minutes. This step locks in the peanut butter layer and makes dipping so much easier.
- Melt the chocolate:
- Use a double boiler or microwave in short bursts, stirring between each one. The chocolate should be silky and just warm, not scorching hot.
- Dip and coat:
- Hold each pop by the stick and dunk it into the chocolate, turning gently to cover all sides. Let the excess drip back into the bowl.
- Add toppings:
- Sprinkle your chosen toppings immediately while the chocolate is still wet. Hesitate and it will harden before you get the chance.
- Final freeze:
- Arrange the finished pops back on the tray and freeze for at least an hour, or until the chocolate shell is firm and glossy.
 Pin
Pin The first time I brought these to a backyard barbecue, I thought theyd be a side note next to the cake and cookies. Instead, adults and kids lined up, and I watched grown men debate whether peanuts or coconut was the superior topping. One friend told me she made them the next weekend for her daughters birthday, and now I get texts every few months asking if I remember the recipe. I do, and I love that something so simple became someones new tradition.
Storage and Make-Ahead Tips
These pops keep beautifully in the freezer for up to a week if you store them in an airtight container or a zip-top bag with parchment between layers. I like to make a double batch on Sunday and pull them out one at a time during the week when someone needs a quick sweet fix. They taste best when eaten straight from the freezer, rock solid and satisfying.
Flavor Variations to Try
Swap peanut butter for almond butter, cashew butter, or sunflower seed butter if youre feeding anyone with allergies. White chocolate is sweeter and pairs beautifully with freeze-dried strawberries sprinkled on top. I once drizzled leftover caramel sauce over the chocolate before it set, and it tasted like a frozen candy bar. You can also roll them in crushed graham crackers, mini marshmallows, or even a pinch of sea salt for something unexpected.
Serving Suggestions and Pairings
These pops shine at pool parties, summer picnics, or any time you need a dessert that doesnt require plates or forks. I love serving them with cold glasses of milk for kids and iced coffee for adults. Theyre also perfect after a spicy dinner when you want something sweet and cooling.
- Set out a topping bar and let everyone customize their own before the final freeze.
- Use them as a fun bribe for homework completion or chore charts, they work every time.
- Pack them in a small cooler with ice packs for road trips or beach days.
 Pin
Pin Theres something deeply satisfying about pulling a tray of these out of the freezer and watching faces light up. They remind me that the best recipes arent always the complicated ones, theyre the ones that bring people together and make ordinary days feel a little sweeter.
Recipe FAQ
- → Can I use a different nut butter?
Yes, sunflower seed butter works well as a nut-free alternative with a similar creamy texture and flavor.
- → How can I melt chocolate without burning it?
Melt chocolate gently using a double boiler or microwave in short intervals, stirring frequently until smooth.
- → What toppings can I add on the chocolate coating?
Chopped roasted peanuts, shredded coconut, mini chocolate chips, and sprinkles all add delightful crunch and flavor.
- → How long should I freeze the pops before serving?
Freeze the bananas for 1 hour before adding peanut butter, then after coating with chocolate and toppings, freeze again for at least 1 hour until fully set.
- → Are these pops suitable for a gluten-free diet?
Yes, the ingredients are naturally gluten-free, but always check labels to avoid cross-contamination.
- → What’s the best way to store these frozen pops?
Store them in an airtight container in the freezer to maintain freshness and prevent freezer burn for up to one week.